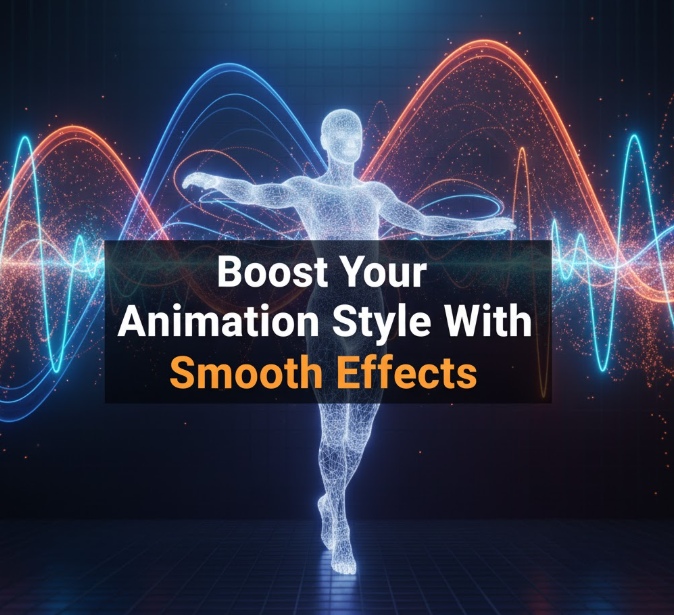
Animation has gone viral online. Whether you are producing social media content or delivering a professional presentation, nice animations can help to make your content look more distinctive. Whether you’re a novice animator or someone trying to raise your skills to the next level, smooth effects are the gateway to creating animations that make people want to see more.
Over-enthusiasm, bad live-action and dodgy production values plague TV transitions – but the key difference between choppy little stick-man animations and those silky-smooth pro versions is down to technique, timing and attention to detail. And that’s what we’re about to dive into; the practical ways to spruce up your animation style using smooth, easy effects that truly make your projects shine. You’ll discover core concepts, valuable tools and how-to guides that help you take an animation from look great to make a difference.
The Importance of Smooth Animation in Digital Age
Smooth animations aren’t just for looks—they’re useful. When they work, they direct the eyes of your viewers, provide imagery to communicate ideas more clearly and establish emotional relationships with your audience. Consider the apps you’re regularly returning to each day. The ones that feel great to use tend to have slick, polished animations.
According to research, people remember visuals 65 per cent better than text. When you add cinematic movement to those images, engagement rates can soar by 80% or more. And it’s not just the numbers, but about creating an experience that feels native and enjoyable.
Smooth effects also build credibility. If someone looks at your animation and sees high quality polished work, they automatically think higher quality and more professional. This is important whether you are making videos for a brand or portfolio, or just for fun.
The Key to Friction-Free Movement
Before we get into the more advanced techniques you need a solid understanding of what exactly makes animations feel smooth. These are concepts that animators have worked with for centuries, from the earliest days of Disney to today’s after effects.
Timing and Spacing
Timing is how long an action takes, Spacing is the path to take an object through during that time. Things in the real world don’t move at constant speeds — they accelerate, decelerate and sometimes come to a stop. The natural rhythm of this behavior should be mimicked in your animations.
For instance, when balls bounce (though this is in 1D) they are fastest at the bottom of their arc and slowest at the top. Space your keyframes evenly, and the motion becomes robotic. The spacing variation is what gives it that smooth, natural look.
Easing Functions
Easing is what adds life to animations. There are three main types:
Ease In — starts slow and ends fast (like a car accelerating)
Ease Out — Begins quickly and gradually slows down (as if brakes are being applied to a car)
Ease In-Out — Takes half of each for smooth experience
Smooth animations feel natural, that is why we choose ease in-out curves or any approximations to it. Object moves slowly, picks up speed and then coasts down gently.
Frame Rate Fundamentals
Frame rate is the number of individual images that appear in a given time span. Here’s what you need to know:
- 24 fps — Cinematic look, films | Smooth with motion blur
- 30 fps — Standard video, online video | Very smooth
- 60 fps — Gaming, high-action scenes | Ultra smooth
- 120 fps — Slow-motion recording | Extremely smooth
30 fps is the sweet spot between smooth motion and file size for most animation projects. Game play and interactive content typically operate at 60fps for reduced latency.
Professional Smoothness Thanks to Clever Techniques
Now, let’s dive into the practical tips that will instantly enhance your animation quality.
Motion Blur Magic
Motion blur is one of the quickest ways to get animations looking a whole lot slicker. In real life, when objects are moving fast we see them as slightly blurry. The digital effect tricks the brain into seeing smoother motion, even when the frame rate is lower.
The vast majority of animation software has motion blur options built into it. With the right balance, makeup (or just a bit of it) can lend you this air. Begin with light touches — too much is absurd and too little loses the effect. A good rule of thumb? Set your shutter angle to 180 degrees, the resultant blur looks normal.
Anticipation and Follow-Through
These two principles breathe life into your animations. Anticipation is a slight movement in the opposite direction before the main action occurs. It’s like when you’re getting ready to jump up, that kind of cooking, squatting a little bit.
Follow through is when bits of an object keep moving after the main mass has stopped. Hair moves even after someone stops walking, or an animal’s tail wags long after it sits down. It is the fine-grained details that give animations weight, that make them feel quotidian and real.
Overlapping Action
Not everything should begin and end simultaneously. Overlapping action is when different parts of your animation (overlaps) at a slightly later time. This in turn has a ripple effect that is much less jarring than everything moving together.
For instance, when making a character turn around you will start with the head, then from the shoulders and finally on the hips. This slight differential in timing results in fluid, natural movement instead of a rigid turning.
Software Tools for Easier Smooth Effects
With the right tools, building silky animations is straightforward. Here’s a look at popular options for different skill levels.
For Beginners
- Canva — Best for easy animations that include ready-made transitions
- Animaker — With preset smooth effects and user-friendly interface
- Powtoon — Best for animated presentations and seamless scene transitions
For Intermediate Users
- After Effects (Adobe) — Industry standard offering strong easing and motion blur controls
- Blender — Blender is free 3D software with a lot of great animation tools
- Cavalry — New Motion Design Tool Built From The Ground Up!
For Advanced Animators
- Cinema 4D — High end 3D animation with the best smoothing algorithms
- Houdini — Paradigm-shifting procedural animation for the most advanced effects
- Nuke — Premium compositing with full range of motion-based control
Many of these programs have graph editors, where you can adjust your easing curves. That’s where the magic is and that’s where all of your time should be spent modifying those curves for the difference between good and great.
Step-by-Step: Your First Smooth Animation
I’ll teach you how to make a simple smooth animation by hand. We’re going to animate a circle moving across the screen with fluoridated smoothness.
Step 1: Set Up Your Project
Open up your animation program and create a new scene. Set it to 30 fps, and with a ticking duration of 3 seconds. Draw a circle around the center left side of your canvas.
Step 2: Create Keyframes
Put your first keyframe at the position of the starting point (the left) on 0 second. Step to 2.5 seconds, add another keyframe at the end position (right side). This leaves you with 0.5 seconds of settling time.
Step 3: Apply Easing
Highlight both keyframes and add ease in-out easing. In all softwares, that’s a “right-click” or a button click on the graph editor.
Step 4: Adjust the Curve
Open your graph editor. You should see a curving connection between your keyframes. And curve the handles gently in an S-curve. The middle section would thus be steeper (faster drive), and the ends flatter (slower start/stops).
Step 5: Add Motion Blur
Turn on motion blur for your circle layer. Set the shutter angle at 180 degrees for regular motion blur.

Step 6: Fine-Tune and Preview
Play back your animation. Does it feel smooth? If the motion feels too slow or too fast, play around with your keyframe timing. If it’s rough, go back to your easing curve and slow it down.
-
Just getting started? You’ll need these tools — read now: 8 Essential Tools Every Animation Starter Needs
Advanced Tricks the Pros Use
These advanced techniques take your work to the next level once you’ve learned the basics.
The 12 Principles of Animation
The 12 principles, which Disney’s now-legendary Nine Old Men put together, have remained as dogma in animation. In addition to those we’ve discussed, look out for:
Squash and Stretch – Objects deform slightly to keep their volume as they move.
Secondary Action — More subtle actions that provides style and makes your main action pop.
Exaggeration — The slight exaggeration of a pushing movement to make the communication clearer
Learn more about the 12 principles of animation to master your craft.
Physics Simulation
These days even basic software is able to reproduce real physics which will animate motions very smoothly and realistically all on its own. This is especially useful for:
- Fabric and cloth movements
- Floating animated particle effects such as fire
- Rigid body collisions and bouncing
It’s a matter of simulating the physics and mixing it with manual keyframes for control and smoothness.
Procedural Animation
Unlike keyframed animation, procedural animation relies on expressions and code to create smooth and automated movement. For example, you can write an expression like this that will make an object slowly move up and down forever (perfectly smoothly and with no keyframes at all!).
This technique is powerful for:
- Repeating patterns
- Organic movements, such as stretching or the effects of wind
- Animations that respond to other things on the page
Common Mistakes That Kill Smoothness
Even the pros get it wrong. Your work will be instantly better without it.
Too Many Keyframes
More keyframes does not equal smoother animation. In fact, quite the opposite. Each keyframe is a potential place where you may create jerky motion. Get away with as few keyframes possible and let the easing curves handle the rest.
Ignoring the Graph Editor
The graph editor is intimidating for a lot of people starting out, and they never touch it missing out on one of the most powerful smoothness tools. Just five minutes learning how to read and adjust the curves will change your life for animations.
Linear Interpolation
Linear is steady-speed with no easing. It looks robotic and unnatural. Make sure to always ease your keyframes.
Inconsistent Timing
Like actions should take like amounts of time. When one button animates in 0.3 seconds and the other takes 1.5 seconds, this inconsistency jars the user. Set time rules for your project and follow them.
Forgetting About Overshoot
Moderate amounts of overshoot make animations feel bouncy and elastic. When something arrives at its destination, overshoot then return. Such a small detail to make something polished and pretty.
Optimizing Performance Without Losing Smoothness
Slick animations ought to be performant, especially when web or mobile content is used! Here’s how you can keep quality intact and file sizes manageable.
Strategic Simplification
We do not expect every element to have intricate smooth effects. Concentrate your efforts on hero elements — the primary parts of a site users click or look at initially. Background elements may be animatable in a more basic manner.
Optimize Your Assets
- Compress images to a lesser extent without visual difference
- Wherever you can, use vector graphics (rather than bitmaps) – they’re smaller and infinitely scalable
- Remove unused keyframes and layers
Framerate Considerations
Web animation can be fine with 24 fps and people won’t even notice the quality drop but file size will decrease. Try multiple framerates out to see what works best for your project.
Whenever You Can, Use CSS and Code to Do This for You
With web animations, CSS and Javascript generally produce smoother results than exported video because they are hardware accelerated. Learn basic CSS animation properties—they are powerful and efficient.
Industry-Specific Applications
Smooth animations are used differently in different areas of study. Here is how to use these principles in particular industries.
Social Media Content
The world of social media is fast moving and smooth animations will make you stand out. Focus on:
- Quick, punchy transitions (0.3-0.5 seconds)
- Looping animations that are never-ending and satisfying
- Text animations that expose information gradually
UI/UX Design
UI animations are crutches for users trudging through documentation and self-directed usage. Best practices include:
- Slight give that’s dynamic (you can feel it but don’t notice it)
- The timing is consistent between all interactions (usually in the range of 200-300ms)
- Easily understandable causal relationships of actions to animations
Educational Content
Sleek animations make it easier to see connections between complicated ideas. Use them to:
- Demonstrate procedures through a series of steps with corresponding visuals and transitions
- Use Soft emphasis to emphasize Important Contents
- Develop symbolic images to render abstractions concrete
Brand and Marketing
Sleek, glossy animations give off professionalism and class. Focus on:
- Continuous movement that reflects personality of the brand
- Sophisticated easing that feels premium
- Animated in unison that several parts of a whole working together harmoniously
Test Your Skills with These Practice Tests
Theory only goes so far. These workouts will help you build some smooth animation muscles.
Exercise 1: The Bouncing Ball
Animate a spheroid bouncing across the screen. Focus on:
- Proper arc trajectory
- Decreasing bounce height
- Squash and stretch at impact
- Natural timing and spacing
This is a classic exercise from which you learn core principles applicable to everything else.
Exercise 2: Menu Reveal
Create a side navigation menu which slides in when you hover over it. Practice:
- Staggered animation of menu items
- Overshoot and settle effects
- Background blur or fade transitions
Exercise 3: Loading Animation
Develop a nice loading spinner or progress indication. This teaches:
- Infinite loop animations (even to those who never do the same task twice)
- Consistent speed throughout the loop
- Visual interest without being distracting
Exercise 4: Character Walk Cycle
Animate a simple character walking. This combines:
- Overlapping action (arms, legs, body) at different times
- Anticipation and follow-through
- Weight and timing
Resources to Continue Your Learning
There is so much in the world of animation, and there’s always more you can learn.
Online Learning Platforms
- School of Motion — Full courses on smooth motion graphics
- Skillshare — Hundreds of animation courses for all skill levels
- YouTube channels such as Motion Design School — Free tutorials are available
Books Worth Reading
- “The Animator’s Survival Kit” by Richard Williams
- “Animation: The Mechanics of Motion” by Chris Webster
- “After Effects Studio Techniques” by Mark Christiansen
- “Creating Motion Graphics with After Effects” by Chris and Trish Meyer
Communities to Join
- Behance — Inspiration & Feedback
- Dribbble — Examples
- Reddit’s r/MotionDesign — Conversation and critique
- Discord servers — Animation software communities
Frequently Asked Questions
How long does it take to learn to animate smoothly?
Simple smooth animation can be picked up in a few weeks of dedicated learning. But it takes months or years to master the nuances. The good news is that you get better with every project. Begin simply, work up to practicing a lot of this kind of stuff, start taking on more complex animations.
Can I use smooth animations without expensive software?
Not at all. Professional software gives more control, but free tools like Blender or DaVinci Resolve with the Fusion page can make smooth animation that doesn’t look too far off. These principles hold true if you are using a different tool as well.
What mistake (in obtaining smooth animations) do new animators make most often?
The most common mistake is not using easing. The most common one that I see with new users is to create keyframes and have them stuck at the default linear (meaning movement is mechanical). Just adding ease in-out to your keyframes will make animations feel 10 times better straight away.
What is the minimum required for smooth animation in frames per second?
For most applications, 30 fps is ideal. It’s great for smooth motion and not too large in file size. Cinematic Projects usually go for 24 fps, Gaming and fast-action stuff aimed at high frame rate like 60 fps. The smoothness derives as much from good easing and timing as it does from high frame rates.
Is it possible to get my 2D animations smooth or is it only for 3D?
Absolutely! All smoothness principles can be applied from 2D animation to 3D. Frame-by-frame 2D animation, vector-based graphics, and motion graphic designs can all be glassy smooth if done right. The smoothest animation ever made is 2D, period.
How do I judge for myself how smooth my movement is?
Demonstrate it to a new visitor. If they can easily follow along without becoming confused about what to do, or nothing feels jarring or mechanical at all you are doing well with smoothness. Plus, if the animation “feels” invisible — in other words, the audience concentrates on the content without being pulled out of it by motion — that is professional smoothness.
My animation is smooth in the software and choppy when I export, why?
This typically occurs due to frame rate mismatches or encoding concerns. You also want to have your export settings match your composition settings. Also be certain you are using high quality presets for encoding. Motion blur is crucial here as well—it’s one of those things that often doesn’t preview properly, but can make a massive difference in the final export.

The Path to Smoother Animations
Make no mistake: crafting smooth animations is an art and a science. It is a matter of principles, techniques and training your sense for motion. The upside is that every animator started the same way you are right now and completion of any project makes you that much better.
Begin with one move, one step at a time. Get the grip of easing curves before switching to motion blur. Familiarize yourself with timing and then move on to overlapping action. Train your skills bit by bit and in no time it will surprise you, how better your animation became.
Don’t forget that the best animations are often those you don’t notice. When it is successful, the viewers don’t think “wow smooth animation”— they just feel the experience and understand your message. It’s the latter that you really want — to create motion that elevates your content but does not distract from it.
With the tools and techniques you’ll learn inside, there won’t be anything holding you back from creating smooth professional-quality animation today! Whether you’re creating content for social media or user interfaces (UIs) or are making branded videos, these principles will take your work to a different level and help you to shine in the cluttered digital world.
Now, open your animation software and start practicing. Create that bouncing ball. Animate that menu. In short, fiddle with those easing curves until they’re easy. For every streamlined animation that you produce, not only are you improving a technical discipline but also learning how to express yourself better through movement and that’s a superpower in the visual age we live in.
The only thing that separates you from smooth, professional effects is time and practice. You now have the knowledge. That part you can do yourself — and that’s the fun part.


